How to Create a Balloon Backdrop That Wows Your Guests
If you’re planning a party or event and want to make a bold, unforgettable statement, few decorations have the visual impact of a well-designed balloon backdrop. Whether it’s for a birthday, baby shower, wedding, graduation, or even a corporate gathering, balloon backdrops serve as stunning photo zones, dessert table features, or entrance focal points. The best part? You don’t need to be a professional decorator to make one. With a little guidance and creativity, you can create a balloon backdrop that will have your guests reaching for their phones and snapping pictures all night.
This step-by-step guide will walk you through everything you need to know to design and build a balloon backdrop at home — even if you’re a beginner working on a budget.
What Is a Balloon Backdrop?
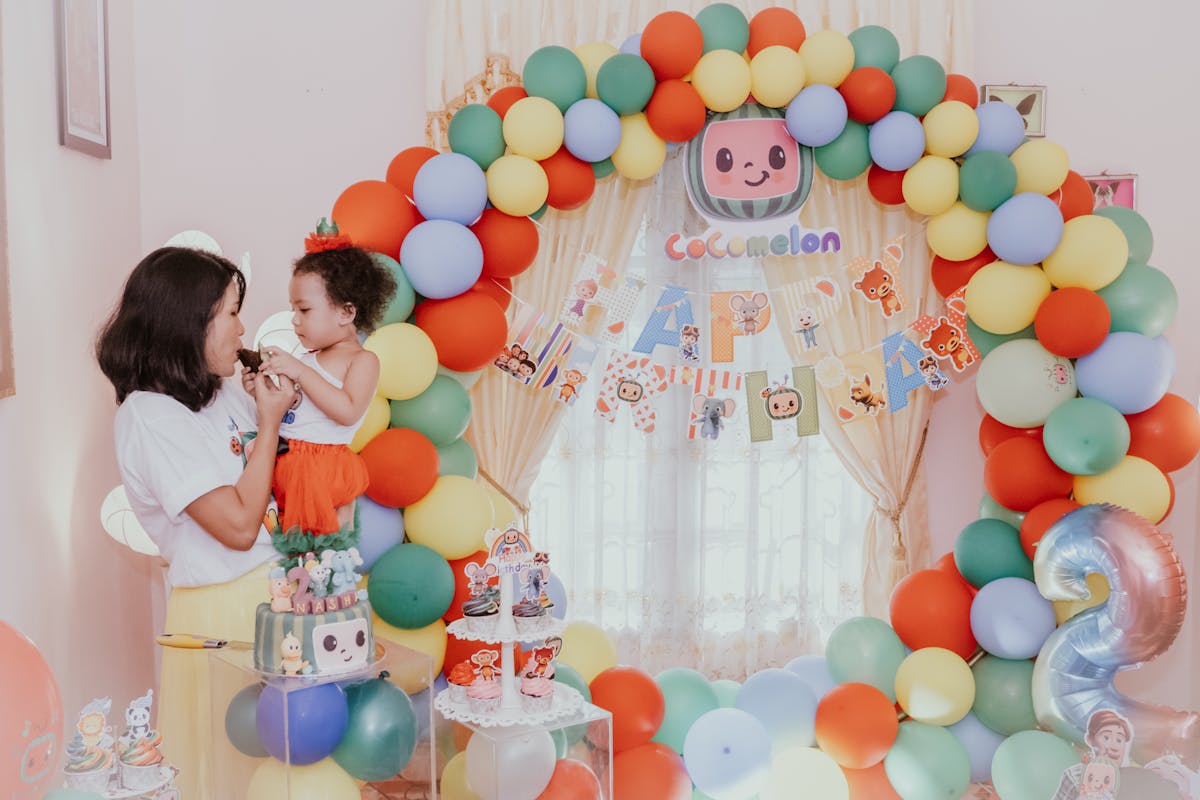
A balloon backdrop is a decorative wall or freestanding structure covered in a strategic arrangement of balloons. It can range from simple to elaborate and is often customized to suit the event’s theme, color palette, or aesthetic. It provides a vibrant and visually rich background for photos, presentations, or key moments like cake cutting or speeches.
Balloon backdrops are incredibly versatile. They can be circular, rectangular, asymmetrical, or shaped to fit around logos, signage, or floral arrangements. And they’re not just for kids’ parties anymore — modern balloon backdrops are often seen at chic weddings, product launches, and influencer events.
Materials You’ll Need
Before you start inflating balloons, make sure you have the following supplies:
- Balloons in various sizes (5″, 10″, 12″, and optional 18″ for impact)
- Balloon pump or electric inflator
- Balloon decorating strip or fishing line
- Glue dots or low-temp glue gun
- Scissors
- Removable wall hooks, backdrop stand, or frame
- Optional: Faux flowers, greenery, ribbons, LED lights, or foil balloons
Balloon kits are available online and often include color-coordinated balloons, strips, and instructions. These can be a great starting point for beginners.
Step 1: Choose a Location and Size
Decide where you want to place your backdrop. This could be behind a dessert table, near an entryway, or in a designated photo area. Measure the space to determine how large your backdrop needs to be. Most backdrops are around 6–8 feet wide and 6–8 feet tall, but you can adjust based on the size of your event or available space.
Consider lighting and traffic flow — you want your guests to be able to interact with the backdrop without causing a bottleneck or being in a dimly lit corner.
Step 2: Select a Color Scheme and Theme
Choose a color palette that complements your event theme. A three-color combination (one dominant color, one accent, and one neutral) works well for most occasions. For example, for a bridal shower, you might go with blush pink, gold, and white. For a kids’ birthday, you might choose primary colors or a pastel rainbow.
You can also mix finishes — matte, metallic, and transparent balloons all offer different visual effects. For a professional touch, look at examples from local decorators. In fact, browsing the social media pages of a well-known balloon company Dallas residents trust is a great way to gather visual inspiration.
Step 3: Inflate and Organize Your Balloons
Inflate your balloons using a hand pump or electric inflator. Vary the sizes to create visual depth and texture. Don’t inflate balloons fully — slightly underinflated balloons are rounder and less prone to popping.
Group the balloons by size and color to make the assembly process smoother. Consider pre-tying balloon pairs to speed up your build later.
Step 4: Build the Base Structure
If you’re using a backdrop stand or frame, attach a balloon decorating strip or string across the top. Begin attaching your largest balloons to form the outline or general shape. Gradually fill in the gaps with medium-sized balloons, followed by smaller ones to fill any holes and smooth out transitions.
If you’re working directly on a wall, use removable hooks or painter’s tape to attach the balloon strip or fishing line. Avoid nails or adhesives that could damage surfaces.
Step 5: Add Dimension and Decorative Accents
This is where your balloon backdrop will go from basic to breathtaking. Use glue dots or a low-temp glue gun to attach smaller balloons (5″) between larger ones for a lush, full appearance. You can also cluster different-sized balloons to one side or create an asymmetrical design for a more artistic look.
To elevate the design, add faux florals, palm leaves, or strands of greenery. You can also weave in LED string lights for nighttime events or attach foil balloons that match your theme (like stars, letters, or numbers).
Step 6: Secure and Finalize the Backdrop
Once your balloon arrangement is complete, step back and look at it from different angles. Fill in any gaps, fix any sagging areas, and make sure the structure is stable. If needed, add extra support at the base or sides using sandbags or additional hooks.
If your event is outdoors, consider wind protection and weather conditions. Use heavier anchors or tie the backdrop to a fence or wall for stability.
Step 7: Set the Stage
Before the event starts, test your lighting. Make sure the area is well-lit for photos. Add a simple rug or floor mat in front of the backdrop for a complete photo booth experience. You can even place a small bench, floral arrangement, or table in front to create a styled scene.
Conclusion
A balloon backdrop is more than just a decoration — it’s an experience that wows guests, enhances photos, and creates memorable moments. With a bit of preparation and creativity, even beginners can build a professional-looking display at home. Whether you’re keeping it simple or going all out with florals and lighting, the satisfaction of creating it yourself is worth the effort. And if you ever need design inspiration or want to compare ideas, take a look at what a top-rated balloon company Dallas locals recommend is doing — it’s a great way to stay on trend while adding your own DIY touch.